

A home’s interior is more than just walls; it’s a canvas waiting to be painted with stories, emotions, and personal style. Our expert painters completed a project in which they transformed a 16-room house, including closets and bathrooms. The highlight of this project was the transformation from warm, choosing natural paint tones of the wood to a crisp, clean white finish on the cabinets.
If you’ve ever contemplated an interior paint job for your home, you understand its potential. In this guide, we’ll explore the vital information you need when deciding to go for interior painting.
Choosing the Right Paint
Selecting the perfect paint for your interior is more than just picking a color; it involves understanding various types of paint and their suitability for different surfaces and rooms within your home.
Types of Paint for Home Interiors
Matte Paint: Ideal for low-traffic areas like bedrooms and ceilings, matte finishes offer a smooth, non-reflective surface, perfect for concealing imperfections. However, they might be less resistant to stains and are more challenging to clean.
Eggshell/Satin Paint: This versatile option suits living rooms and dining areas. Offering a subtle sheen and some washability, it balances durability and a soft finish.
Semi-Gloss/Gloss Paint: These high-sheen finishes are durable, moisture-resistant, and easy to clean, making them suitable for high-traffic zones like kitchens, bathrooms, and trim work. They reflect light, adding brightness to smaller spaces.
Tips for Choosing Paint Colors for Different Rooms
Consider Room Function: The function of a room dictates color choice. For instance, serene blues or greens might be apt for bedrooms, while vibrant hues like yellows or oranges could invigorate social spaces.
Evaluate Lighting: Natural and artificial light influences how paint colors appear. Test paint swatches in the room under different lighting conditions to gauge their true colors.
Personal Preferences: Trust your instincts. Choose colors that resonate with your style and evoke the mood you desire for each room. Remember, different shades can evoke different emotions.
Preparing the Space
Before diving into the paint job, thorough preparation sets the foundation for a successful and smooth process, ensuring optimal results that stand the test of time.
1. Clearing the Room
Furniture and Fixtures: Begin by removing as much furniture as possible from the room. If relocation isn’t feasible, move items to the center and cover them with drop cloths or plastic sheets to shield them from paint splatters.
Remove Fixtures: Take down light fixtures, switch plates, outlet covers, and other removable fixtures or hardware.
2. Surface Preparation
Cleaning: Start with a clean canvas. Wash the walls to eliminate dust, grease, and dirt—a mild detergent solution and a sponge work well. Allow the walls to dry completely before proceeding.
Patching and Repairs: Inspect the walls for holes, cracks, or imperfections. Fill these areas with spackling or joint compound and smooth them once dry.
Sanding: Lightly sand the walls after patching to ensure a smooth surface for painting. Sanding also helps remove any gloss or sheen from existing paint for better adhesion.
Priming: Consider using a primer, especially on bare surfaces or when transitioning between drastically different colors. A primer enhances paint adhesion and helps achieve a uniform finish.
3. Protecting Furniture and Fixtures
Cover and Mask: Shield furniture, floors, and fixtures with drop cloths or plastic sheets. Use painter’s tape to cover edges and areas that shouldn’t be painted, like trim or windows.
Furniture Relocation: If feasible, move furniture out of the room entirely to prevent accidental damage and facilitate a smoother painting process.
Additional Tips
Ventilation: Ensure adequate ventilation by opening windows or using fans to circulate air, especially when working with primers or paints with strong odors.
Safety Gear: Wear appropriate clothing and safety gear, including goggles and a mask, especially when sanding or using chemicals.
Labeling: If removing fixtures or hardware, label each item or store screws and parts in clearly marked bags to facilitate reinstallation later.
Hiring a Professional Painter
Benefits of Professional Painters
Expertise and Experience: Professionals bring a wealth of experience and knowledge to the table. They understand the nuances of different surfaces, paint types, and application techniques, ensuring a high-quality finish.
Time Efficiency: Professional painters work efficiently, completing projects in a fraction of the time it might take for a DIY project. Their streamlined process minimizes disruptions to your routine.
Quality Results: Professionals equipped with top-tier materials and tools achieve exceptional outcomes—their focus on the project at hand guarantees seamless coats and impeccable finishes.
Proper Preparation: From surface preparation to the final coat, professionals handle each step meticulously, ensuring proper priming, masking, and protection of surfaces and fixtures.
Licensed and Insured: Reputable painters are licensed and insured, providing peace of mind in case of accidents or damages during the job.
How to Find a Reliable Painter
Seek Recommendations: Ask friends, family, or neighbors for referrals. Word-of-mouth recommendations often lead to trustworthy professionals.
Online Research: Utilize online platforms to research local painters. Check reviews, ratings, and portfolios to assess their work quality and customer satisfaction.
Check Credentials: Ensure the painter holds the licenses and certifications your local area requires. Verify their insurance coverage to protect against liabilities.
Request Estimates: Obtain multiple quotes from different painters. Compare prices while considering the quality of materials, timeline, and services offered. Be cautious of significantly low estimates.
Review Their Portfolio: Request examples of their previous work. A reputable painter should proudly showcase their portfolio. By reviewing their portfolio, you can easily gauge their style and expertise.
Clear Communication: A reliable painter communicates effectively. Ensure they understand your vision for the project and are open to discussing timelines, budgets, and specific requirements.
Contracts and Guarantees: Review the contract thoroughly. Ensure it includes detailed project specifications, costs, paint brands, timeline, and any warranties or guarantees on workmanship.
Budgeting and Cost Considerations
Estimating the cost of an interior painting project involves careful planning and consideration of various factors to ensure a successful and financially manageable outcome.
Estimating the Cost of the Project
Material Expenses: Calculate the quantity of paint required based on the square footage of the area to be painted. Consider additional materials like primer, brushes, rollers, painter’s tape, and drop cloths. Research the costs of high-quality materials from different suppliers to create a realistic budget.
Labor Costs: Labor costs fluctuate depending on project size, intricacy, and the rates set by painters or contractors. Seeking estimates from several professionals can provide insight into the typical labor expenses in your locality.
Contingency Planning for Unexpected Expenses
Budget Buffer: Allocate a reserve fund, usually 10-15% of the overall budget, to account for unexpected project alterations or unforeseen expenses. This cushion offers financial adaptability in case unanticipated costs emerge.
Prioritize Needs vs. Wants: Distinguish essential expenses from optional upgrades to reallocate funds if unexpected expenses arise. Consider what aspects of the project are crucial and where adjustments can be made if necessary.
Regular Communication: Maintain open communication with painting professionals throughout the project. Promptly address any unforeseen issues to minimize additional costs.
Research and Planning: Thoroughly research and plan before the project starts. Understanding potential challenges or complexities helps in creating a more realistic budget.
Scheduling the Project
Seasonal Considerations: Choose the time of year wisely. Warmer months are often preferred for interior painting projects, as they offer ideal conditions for paint application and drying. Avoid extreme temperatures and high humidity, as they can affect paint quality.
Personal Considerations: Consider personal schedules, family events, or any planned gatherings that might impact the painting schedule. Coordinate the project timeline to minimize disruptions to daily routines.
Establishing a Realistic Timeline
Assessing the Scope: Evaluate the project’s size, number of rooms, and any additional preparatory work required. Break down the project into stages, considering the time needed for preparation, painting, drying, and potential touch-ups.
Consulting Professionals: Discuss the project timeline with the painting professionals or contractors. Their expertise can provide insights into the estimated duration based on the project’s scope and requirements.
Factor in Drying Time: Account for adequate drying time between coats, considering the type of paint used and environmental conditions. This ensures each coat is set properly before the next application.
Flexibility in Schedule: Allow for flexibility in the timeline to accommodate unexpected delays or additional work that might arise during the project. A flexible approach helps manage unexpected challenges without affecting the overall schedule.
Consideration of Family and Work Schedules
Planning Around Commitments: Coordinate the painting schedule around family members’ work, school, or other commitments to minimize disruptions.
Minimize Disruption: Depending on the scope of work, consider painting one room at a time to minimize inconvenience. This allows for continued use of other spaces within the home.
Effective Communication: Maintain clear communication with the painting professionals regarding scheduling preferences or constraints.
Temporary Living Arrangements: Plan for temporary living arrangements if needed or utilize unaffected areas of the house during the painting process to ensure comfort and safety.
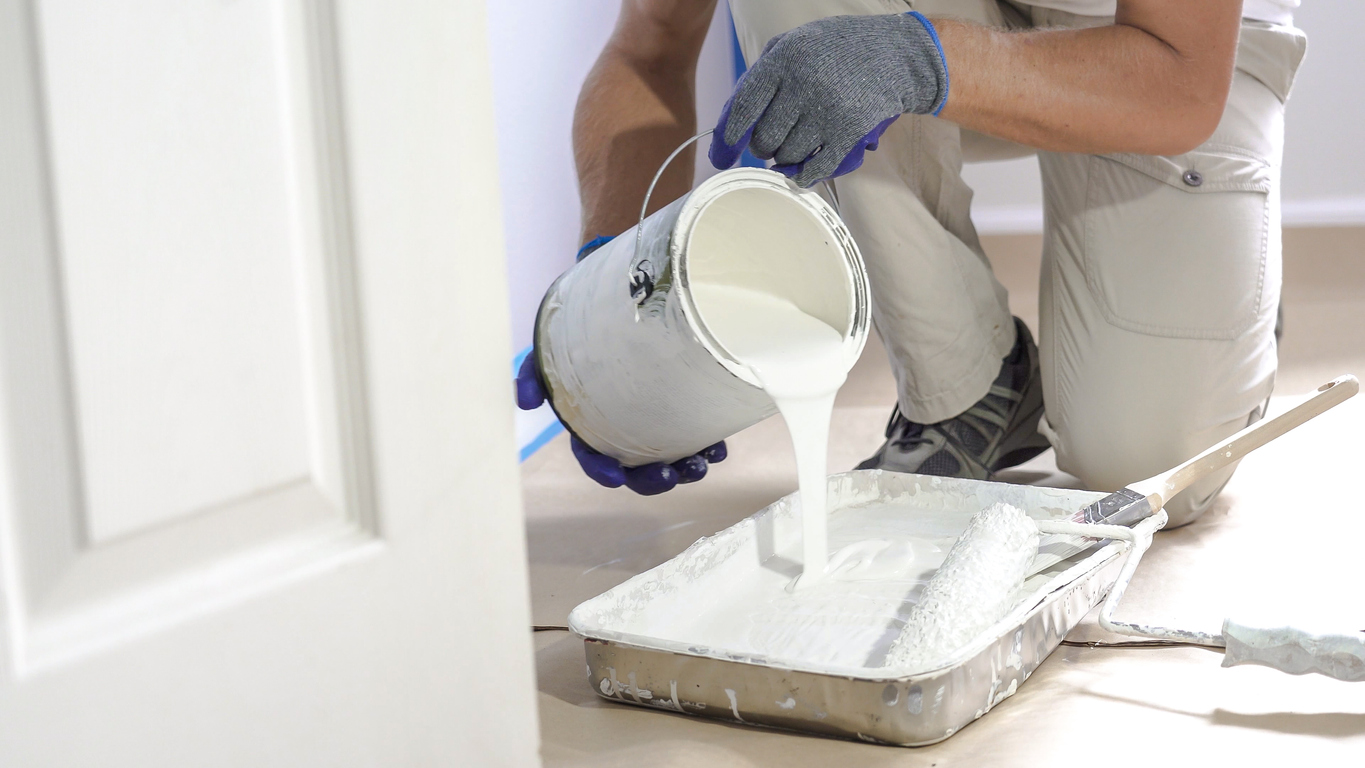
During the Painting Project
When the brushes are in motion and the walls begin their colorful transformation, certain aspects require attention to ensure quality control and effective problem-solving during the ongoing painting process.
Quality Control
Supervision and Inspection: Regular supervision is essential. Periodically inspect the ongoing work to ensure it aligns with the agreed-upon standards. Check for even coats, proper paint application techniques, and adherence to the project plan.
Consistency in Application: Monitor the consistency in paint application. Ensure even coats, proper drying between layers, and attention to detail in areas such as corners, edges, and trim work.
Adherence to Preparatory Standards: Verify that the preparatory work, including cleaning, patching, priming, and masking, was executed as planned. Address any deviations immediately to maintain the quality of the final outcome.
Problem-Solving
Open Communication: Maintain clear and open communication with the painting team. Address any concerns or issues promptly to prevent them from escalating.
Addressing Imperfections: Identify and address imperfections or issues as they arise. Collaborate with the painters to immediately rectify problems like drips, uneven coats, or color inconsistencies.
Flexibility and Adaptability: Be prepared for unexpected challenges or changes in plans. Maintain flexibility to adapt to unforeseen issues without compromising the project’s quality or timeline.
Timely Adjustments and Corrections: Make any necessary adjustments or corrections promptly. Timely action minimizes disruptions and maintains the project’s momentum.
Professional Input and Expertise
Seek input from the painting professionals. Their experience and expertise can offer effective problem-solving strategies or recommendations for the best course of action. Address any unforeseen issues or complications swiftly. Timely resolution helps prevent potential delays and ensures a smooth project continuation.
Post-Painting Care and Cleanup
Inspect the painted surfaces carefully once the painting is complete. Check for uniformity in color and even coverage, and address any missed spots or imperfections. View the painted areas under various lighting conditions to ensure the colors appear as desired in natural and artificial light.
Removing Protective Coverings
Cautiously remove any protective coverings, such as drop cloths or plastic sheets, to prevent the spreading of dust or paint residue. Dispose of these coverings appropriately. When uncovering furniture and fixtures, inspect them for paint splatters or residue. Clean these areas gently as needed.
Cleaning Up and Disposing of Materials
Tools and Equipment: Clean painting tools such as brushes, rollers, trays, and paint cans thoroughly per the manufacturer’s instructions. Dispose of any materials that can’t be reused or cleaned.
Disposing of Paint and Chemicals: Follow local guidelines for disposing of paint cans, leftover paint, and any chemicals or solvents used during the painting process. Adhere to proper disposal regulations to protect the environment.
Waste Disposal: Dispose of debris, used tapes, sandpapers, or any other waste generated during the project responsibly, adhering to local waste disposal regulations.
Final Inspection and Touch-Ups
After cleanup, reevaluate the painted areas for any missed spots, inconsistencies, or areas requiring touch-ups. Address these promptly to ensure a flawless final result.
Touch up any areas that need additional paint or corrections. Ensure that any touch-ups seamlessly blend with the rest of the painted surfaces.
Client Walkthrough
Consider a walkthrough with the painting professionals to discuss any final concerns or touch-ups before officially concluding the project. Once satisfied with the outcome, provide the final approval to close the project.
Conclusion
From choosing the best paint to the final brushstroke, every step in painting your Pleasanton home’s interior crafts a haven that reflects your style. This transformation isn’t just about walls; it’s about creating an atmosphere where memories flourish and every moment feels like home.
Before you begin, recognize the signs indicating your home requires a fresh coat. Next, select the appropriate paint type and finish and choose colors that complement your aesthetic. Now, onto the specifics: declutter the room, safeguard your belongings, repair any imperfections, and prepare your surfaces diligently.
Custom Painting, Inc. has your back if you are looking for a professional to paint your home according to your imagination. Allow our team at Custom Painting, Inc. to assist in transforming your space! Contact us at 925-294-8062 or fill out this Contact Us form on our website to get started.
